
Donut Wall
- Jun 6, 2018
- 2 min read
Donut walls are amazing gifts from the party planner god. Whoever came up with the donut wall deserves some kind of prize! I've seen a number of them on Pinterest and Instagram and most of the ones I've come across are rentals and are marked about the cost of my arm. I've been meaning to make my own but never got around to doing it because it just seemed so difficult. I was incredibly wrong and I wish I worked up the courage to make this sooner.
What you'll need:
- A Drill
- A Forstner Bit: 1/2
- 12" X 24" Birch Plywood
- 12 x Wooden Dowel Pieces: 2"
- Pencil
- Ruler
- Stain
- White Paint
- Paint Brush
- The word "donut" printed off your computer
- White Chalk
- Glue Gun

Step 1: Divide your plank of wood into 5 using your pencil and ruler. Make sure 4 out of 5 of those are of equal height. The last section will be larger which will be for your "donut" sign. In the middle of those 4 sections, mark 3 spots for your wooden dowel hooks. This is where your donuts will sit. Make sure that they are spaced the exact same.

Step 2: There should be 12 marks on your wooden board! Drill each mark with your bit so that it makes a small hole (make sure you don't go through to the other side). Since I only had one plank to work with, I asked my handy man husband for some assistance.

Step 3: Get your child to do the hard work and have them erase the pencil markings. LOL

Step 4: Time to stain! Ahh, my favourite part of a project is staining my wood with this amazing stain. Can you tell how often use this?

Step 5: Make sure to get your husband to take an action shot of you and your little partner getting er done!

Step 6: I could only find long wooden dowels at the dollar store so I had to cute 2" sized dowels for this project. I used my hammer and made sure to add some hot glue onto the ends to secure them into the wood after hammering.
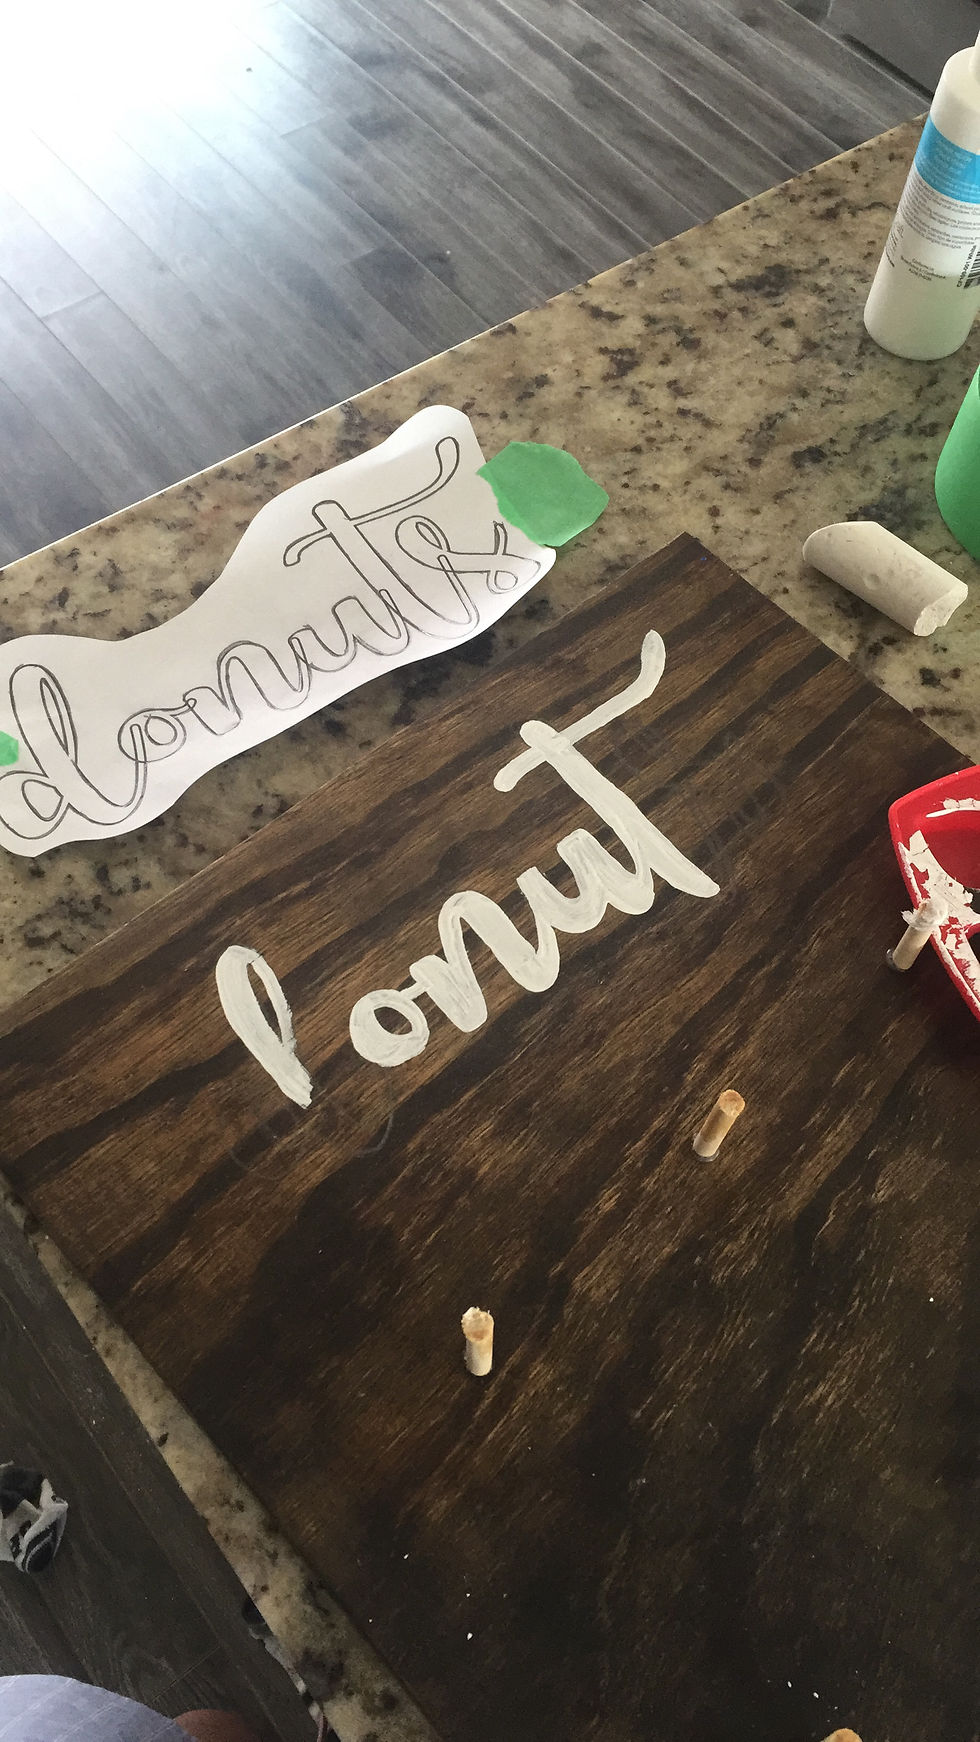
Step 7: It took me a few days to figure out how I wanted to do this. I've transferred text onto wood and paper a number of times but this time I was working with stain. I decided to print out the word donut using my computer, then covering the back of the paper with white chalk and tracing it straight onto the wood. I was left with an outline of the letters, which I outlined more with my pencil. When I was happy with the outline, I used a wet cloth to remove the chalk and I then went over it with white paint and a straight edge brush. I usually go over the lettering once and wait for it to dry and then cover all of the imperfections up the second time around.
This is what I'm left with and I'm thrilled with the results!

Step 8: Add donuts and greenery, also maybe a filter or not? This looks so great on a table and I can't wait to add some "fancy" donuts! Hah. Hope you like it!

For the gram? Amiright?

Comments